

Every senior year is a milestone filled with late-night study sessions, hallway friendships, cap-and-gown photos, and bittersweet goodbyes. A senior box captures the spirit of this unforgettable chapter, turning fleeting moments into a lasting keepsake. Whether you’re crafting one for yourself or as a gift, learning how to make a senior box lets you preserve memories in a tangible, personal way.
You don’t need expensive supplies or artistic talent to start. A simple wooden box, scrapbook paper, and a few sentimental items are enough to create something meaningful. Many creators spend about five joyful hours crafting with friends, turning the project into a shared celebration. This guide walks you through every step, from picking a base to filling it with meaningful mementos.
Pick the Right Base Box

Choose a Customizable Container
Select a base box that’s easy to decorate. A plain wooden box from a craft store works perfectly and typically costs around $10. Look for clean lines and minimal detailing so you have full creative freedom. Avoid overly ornate boxes that limit your ability to personalize.
Size matters less than usability. Even a small box can hold big memories. If you’re working with a $20 total budget, a basic box leaves room for decorative upgrades later.
Explore Alternative Container Options
While wooden boxes are popular, you can also use decorative gift boxes, vintage tins, or fabric-covered storage cases. Just make sure the interior is smooth enough to line with paper and sturdy enough to hold photos and trinkets.
Pro Tip: Bring your box home before buying other supplies so you can measure the interior accurately for lining.
Line the Interior with Themed Paper
Select Paper That Matches Your Vision
The inside of your senior box should feel inviting and personal. Choose scrapbook paper that matches your chosen aesthetic. Pink florals create soft elegance, while purple velvet patterns add sophistication. Sky-blue designs bring a calming vibe, and Paris-inspired prints offer a dreamy, nostalgic feel.
Cut the paper precisely to fit the bottom and sides. Use a ruler to measure each panel, then trim with scissors or a craft knife. Apply glue evenly to avoid bubbles or wrinkles.
Build a Cohesive Visual Backdrop
Think of the interior as a canvas. A well-lined box sets the tone for everything else. Match paper colors to your overall theme, use solid colors if adding many photos, and add subtle patterns if the contents are minimal. This foundation makes every keepsake stand out.
Add Personal Touches That Stand Out
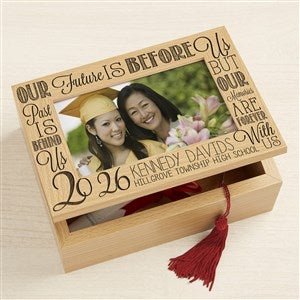
Spell Out Your Year and Name
Make the box unmistakably yours. Use wooden letters and numbers to spell “Senior 2026” or your name. You can paint, stain, or leave them natural depending on your style. Glue them prominently on the lid or inside the box.
For a feminine touch, add ruffle ribbon along the edges, pearls or rhinestones for sparkle, and puffy paint for raised, colorful designs. Arrange elements before gluing so you can adjust spacing and avoid mistakes.
Attach a Photo Frame Inside the Lid
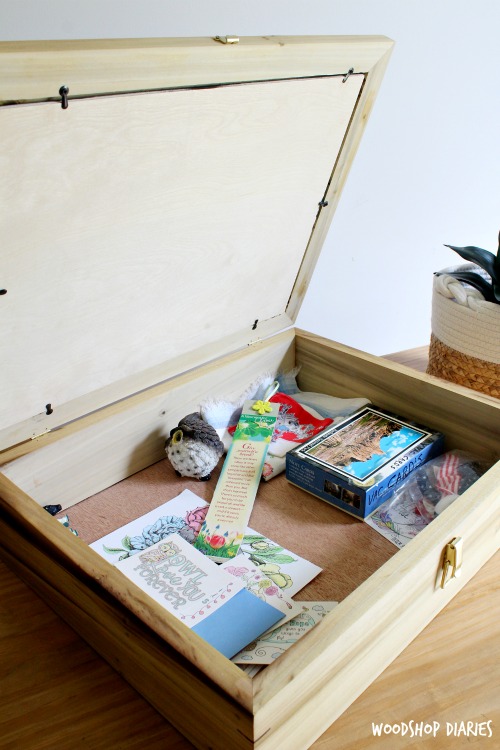
Add a small picture frame to the inside of the lid. Insert a cap-and-gown photo, prom picture, or group shot of your closest friends. When opened, the box reveals this visual centerpiece, creating an emotional moment years later. You can also hang mini photos along the sides using tiny clips or ribbon.
Fill Your Senior Box with Meaningful Mementos
Include Essential Senior Year Items
Start with tangible pieces of your final year:
- Graduation tickets
- Class photos and candid shots
- Handwritten notes from friends
- Friendship bracelets
- Concert, game, or dance ticket stubs
These items instantly transport you back to specific moments. A ticket stub from homecoming represents music, laughter, and unforgettable nights.
Go Deeper with Story-Rich Keepsakes
Move past standard items and include a printed Instagram post, a favorite playlist from senior year, a copy of your class schedule, or a letter to your future self. Each item tells a story. The goal isn’t to fill space; it’s to preserve feeling.
Choose a Theme That Reflects Your Personality

Pink: Soft and Sentimental
A pink-themed senior box radiates warmth and nostalgia. Use pastel wrapping paper, lace trim, and scented candles in rose or vanilla. Pair with handwritten letters for a romantic, heartfelt look.
Purple: Elegant and Thoughtful
Purple evokes royalty and reflection. Try velvet fabric, lavender-scented items, and inspirational quote cards. Add vintage books or art supplies if you’re creatively inclined.
Blue: Calm and Reflective
Blue themes bring serenity. Use navy or sky-blue paper, cozy mini blankets, and calming tea bags. This look works well for a “Relax & Reflect” concept.
Paris-Inspired: Dreamy and Nostalgic
Channel Parisian charm with Eiffel Tower scrapbook paper, French phrases like “C’est la vie,” and mini postcards. This aesthetic feels timeless, like flipping through an old European diary.
Try Creative Box Concepts

Build a Golden Years Box
Celebrate your journey with vintage touches. Add retro candy labels, sepia-toned photos, and a music playlist from your childhood. This box honors how far you’ve come.
Design a Legacy Box
Leave space for the future. Include blank cards for future notes, envelopes labeled “Open when…,” and a timeline of your life so far. This box grows with you through graduations, birthdays, and milestones.
Create a Relax and Reflect Box
Focus on mindfulness. Add essential oils, meditation guides, and a soft music playlist via QR code. Great for seniors feeling overwhelmed by change.
Stick to a Budget Without Sacrificing Style
Plan a $20 Senior Box
Break down your spending:
- Base box: $10
- Remaining $10 for paper, glue, ribbon, and small decor
You don’t need to buy everything new.
Save Money with Smart Strategies
Borrow supplies from crafty friends, such as extra pearls, unused ribbon, or leftover paint. Use what you already have at home: old photos, cards, or fabric scraps. Choose minimalistic designs that rely on content, not cost. One creator saved significantly by borrowing ruffle ribbon and puffy paint, adding unique flair without spending a dime.
Prioritize Meaning Over Perfection
Embrace Authenticity
Your senior box doesn’t need to look like it came from a boutique. What matters is that it feels like you. A messy glue job shows effort. A crooked letter adds character. Let your personality shine, whether you’re minimalist, bold, or whimsical.
Focus on Emotional Value
A friendship bracelet might cost $1, but its sentimental worth is priceless. A crumpled note from a best friend means more than any decoration. Prioritize items that spark joy, laughter, or even happy tears.
Invite Friends to Join the Process
Turn Crafting Into a Shared Memory
Don’t make the box alone. Invite friends over for a crafting session. Share stories, play music, and help each other choose the right photos. Five hours of laughter and glue sticks become a memory in themselves.
Document the Creation
Take photos during the process and include one in the box. Years later, you’ll remember not just senior year, but the afternoon you built this keepsake together.
Add Final Touches and Plan for the Future
Leave Room for Growth
Don’t overfill the box. Save space for future additions, extra notes, or a letter to open in ten years. A good memory box evolves over time.
Store It Properly
Keep your senior box in a cool, dry place away from sunlight to prevent fading. A closet shelf or under-bed storage works well. Place it in a protective outer box to avoid dust if possible.
Frequently Asked Questions About How to Make a Senior Box
What is a senior box?
A senior box is a decorative container filled with meaningful keepsakes from your final year of high school. It acts as a time capsule holding tickets, photos, notes, and small tokens that capture the senior year experience.
What should I put inside a senior box?
Include graduation tickets, candid photos, handwritten notes from friends, friendship bracelets, event ticket stubs, and a letter to your future self. Choose items that tell the story of your senior year and spark strong memories.
How much does it cost to make a senior box?
Many senior boxes cost around $20 total. A plain wooden base box runs about $10, leaving $10 for scrapbook paper, ribbon, and small decorations.
How long does it take to make a senior box?
Plan for at least five hours, especially if you craft with friends. The process includes selecting supplies, lining the interior, decorating, and filling the box with mementos.
Can I make a senior box without buying a wooden box?
Yes. You can use decorative gift boxes, vintage tins, or fabric-covered storage cases. Just make sure the interior is smooth enough to line with paper and sturdy enough to hold your keepsakes.
Should I make a senior box alone or with friends?
Crafting with friends makes the experience more memorable. You can share supplies, swap ideas, and turn the project into a celebration of your final year together.
Final Thoughts on Creating a Meaningful Senior Box
Learning how to make a senior box is about more than crafting; it’s about commemorating a life stage. Start with a $10 wooden box, add themed scrapbook paper, and decorate with wooden letters, ribbon, and photos. Fill it with tickets, notes, and trinkets that tell your story.
Choose a theme that reflects your personality, whether that’s pink, purple, blue, or Paris-inspired. Explore concepts like the Golden Years, Legacy, or Relax & Reflect box for deeper meaning. Stick to a $20 budget by borrowing supplies and using what you already have.
Most importantly, prioritize authenticity over perfection. Let your box be emotional and real. The time you spend creating it becomes part of the memory itself. Start gathering your supplies today, and build a keepsake you’ll treasure for decades to come.