Struggling to stand from a chair or climb stairs without hesitation? You’re not alone, and the solution is simpler than you might expect. Learning how to do a squat for seniors is one of the most effective ways to maintain independence, boost balance, and reduce your fall risk. The squat mirrors everyday movements like sitting and standing, making it a true cornerstone of functional fitness after 60.
Research shows that the ability to perform repeated chair stands is a strong predictor of long-term health. Completing 35 to 37 sit-to-stands in 60 seconds at age 53 strongly suggests better health 13 years later. The good news is that with the right technique, anyone can build strength safely. This guide breaks down the safest, most effective way to squat, with clear modifications for every fitness level.
Master the Stability-First Squat Technique
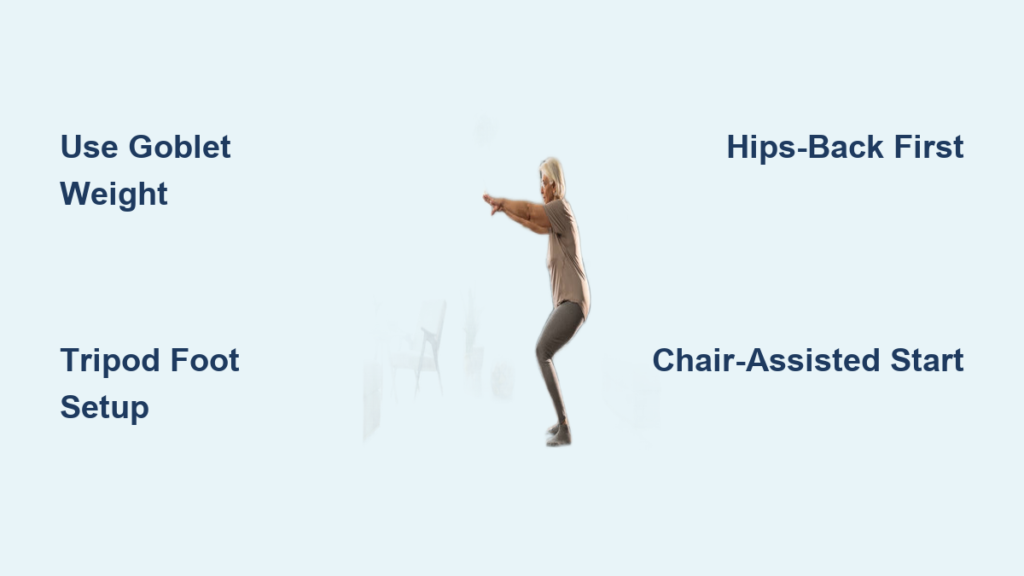
The traditional “arms-out” squat can strain your knees and actually reduce your balance. Instead, seniors benefit most from the stability-first method, a three-step approach that builds strength while protecting your joints. This technique reprograms your movement patterns to enhance glute activation, improve posture, and prevent forward lean. The goal isn’t about how low you go; it’s about moving correctly every single time.
Use a Goblet Counterweight for Better Balance
Hold a light weight, such as a dumbbell, kettlebell, or even a heavy book, close to your chest during the squat. This goblet squat position shifts your center of gravity forward naturally, helping you stay balanced without stretching your arms out. When your arms extend forward, they act like crutches, which reduces core engagement and increases pressure on your knees. The weight at chest level promotes an upright torso, activates your core, and encourages proper hip mechanics. Start with 3 to 5 pounds to learn the movement. The aim is better body control, not heavy lifting.
Set Up the Tripod Foot for Grounded Stability
Balance starts from the ground up. Stand barefoot or in grippy shoes and press firmly into three points on each foot: your big toe, little toe, and heel. This tripod foot setup creates a stable base, improves your sense of body position, and prevents wobbling at the bottom of the squat. As we age, foot sensitivity naturally declines, so going barefoot helps you feel the floor and correct imbalances in real time. Keep your weight evenly distributed across all three points throughout the entire movement.
Follow the Hip-Back, Chest-Tall Sequence
Never bend your knees first. The correct order is:
- Sit your hips back, as if reaching for a chair behind you
- Lift your chest to keep your upper body open and tall
- Bend your knees only after your hips and chest are properly positioned
This sequence prevents forward lean, keeps your spine neutral, and activates the glutes and hamstrings that are critical for mobility. Bending your knees first shifts your weight forward, increasing knee strain and reducing stability. If you feel wobbly during the movement, you likely broke this sequence.
Start with Beginner-Friendly Squat Variations
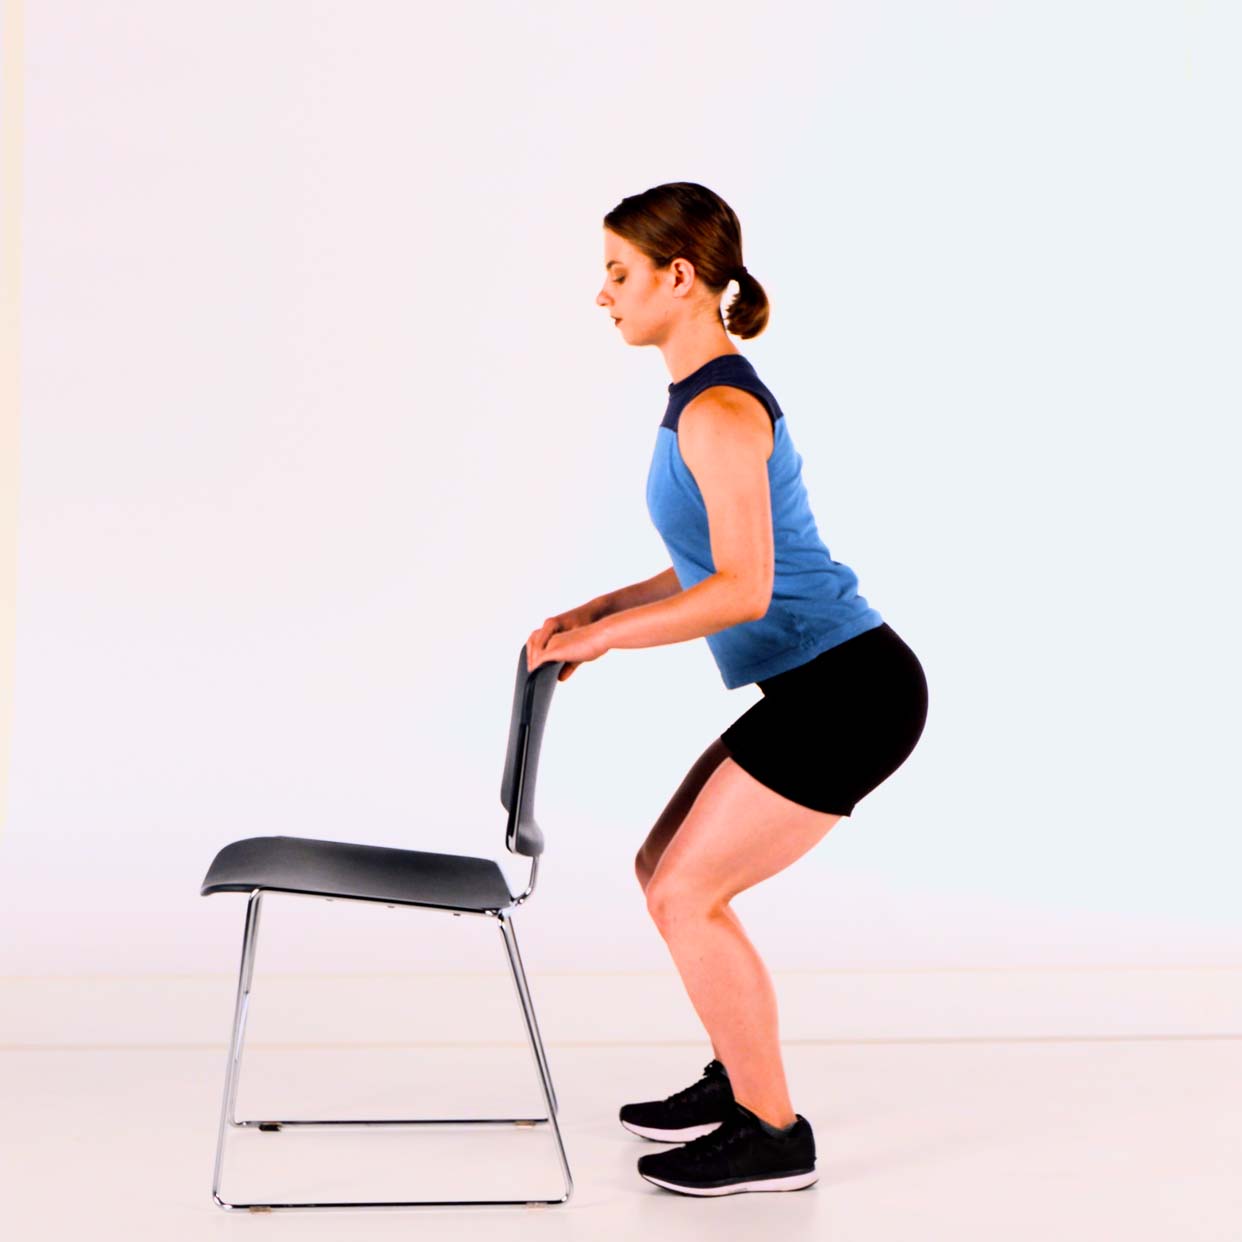
Not ready for full squats yet? That’s perfectly fine. Begin with modified versions that build strength and confidence gradually. These progressions let you master form before increasing difficulty, which reduces injury risk and boosts long-term success.
Try the Mini Squat with Counter Support
Face a countertop and place your hands lightly on it for balance. Stand with your feet shoulder-width apart. Slowly bend your hips and knees, lowering just a few inches as if sitting into a chair. Keep your chest up and your back straight, then return to standing by pressing through your heels. This shallow movement builds leg strength with minimal joint stress. Start with 10 to 12 reps, 2 to 3 times per week. Once you can do 20 reps pain-free, move to the next level.
Perform the Chair-Assisted Sit-to-Stand
Sit on the front edge of a sturdy chair with your feet flat and shoulder-width apart. Lean forward slightly so your nose is over your toes, then push through your heels to stand. Lower back down with control, lightly touching the seat before standing again. This mimics real-life movement and strengthens the muscles you use daily. Use your arms at first if needed, then progress to one arm, and finally no hands. Aim for 15 to 20 slow, controlled reps. Stop immediately if you feel knee or back pain. Your safe depth is wherever movement feels strong and pain-free.
Progress to Supported Squats
Use a countertop, door frame, or handrail for light support as you squat deeper. Keep your back straight and focus on control rather than depth. The support helps you practice proper form while building confidence. Over time, gradually reduce your hand use until you can squat without any assistance. This step bridges the gap between chair-assisted squats and full unsupported squats.
Advance to Full and Loaded Squat Variations
Once you’ve mastered the basics, you can safely increase the challenge and build even more strength. These variations add resistance and depth while maintaining safety.
Learn the Full Air Squat
Stand with your feet shoulder-width apart and toes pointing forward. Initiate the movement by pushing your hips back, keeping your chest tall and head neutral. Lower slowly while keeping your knees behind your toes. Engage your core by pulling your belly button in. Inhale as you lower down, then exhale forcefully as you stand up. You can use your arms for balance if needed, but avoid extending them forward. This full-body movement activates your quads, glutes, hamstrings, and core. Only progress to this variation after mastering supported versions with perfect form.
Add Resistance with Goblet or Dumbbell Squats
Hold a dumbbell or kettlebell at chest level for a goblet squat, or hold one in each hand at your sides. The added load builds muscle faster and improves bone density. Start light, around 5 to 10 pounds, and focus on smooth, controlled motion. The resistance should make the movement feel somewhat hard but not exhausting. If your form breaks down, reduce the weight or reps. Household items like a water jug or a heavy purse work just as well, so no gym is required.
Try the Wall Squat (Air Bench)
Stand with your back against a wall and your feet 12 to 18 inches forward. Slide down until your thighs are parallel to the floor in a 90/90 position. Hold for 30 to 60 seconds, then push back up. This isometric hold builds quad and glute endurance. Never do this exercise in socks. Use bare feet or grippy shoes to prevent slipping. You can also use a cane for support if needed. Build up to this exercise gradually rather than attempting it as a first step.
Fix Common Squat Mistakes Quickly

Even small errors can reduce effectiveness and increase your injury risk. Avoid these common pitfalls to get the most from every rep.
Don’t Bend Your Knees First
This is the most frequent mistake. Bending your knees before hinging your hips causes forward lean, shifts weight onto your knees, and reduces glute activation. Always initiate with the hips by sitting back first, then bend your knees. This protects your joints and builds the muscles that keep you mobile.
Avoid Rounding Your Back
A rounded spine increases injury risk, especially if you have existing back issues. Keep your back neutral and maintain its natural curve throughout the movement. Use the dowel method: place a broomstick along your spine so it touches your head, mid-back, and tailbone. If you lose contact with any point during the squat, your form needs adjustment. This “posh squat” trains proper alignment and is ideal for beginners or those recovering from back pain.
Keep Your Knees Properly Aligned
Letting your knees cave inward places stress on the joints and reduces stability. Keep your knees in line with your toes throughout the movement. If you struggle with this, practice in front of a mirror or place a resistance band just above your knees to cue outward pressure.
Follow a Safe Progression Plan for Lasting Results
Strength builds over time, and rushing the process often leads to injury. Use this step-by-step approach to advance safely and sustainably.
Master the Hip Hinge First
Before adding squats to your routine, learn to hinge properly at your hips. Use the dowel method to ensure your spine stays neutral while your hips move back. This builds the foundation for all safe lower-body movements. Practice this motion daily until it feels completely natural.
Increase Your Depth Gradually
Use a chair to control your depth by lowering until you lightly touch the seat. This prevents overexertion and builds confidence. If you feel pain, simply sit down and stand back up. Over several weeks, you’ll naturally squat deeper without discomfort. Never push through pain. True progress is measured by pain-free reps, not depth.
Add Load Only After Perfect Mastery
Once your form is solid, you can add resistance. Start with 3 to 5 pounds and increase slowly. Loading a poor movement pattern increases your injury risk significantly. If you wobble or lose balance, drop back to bodyweight and rebuild your form.
Prioritize Safety and Consistency Every Session
The best routine is one you can perform safely, week after week. Focus on consistency rather than intensity.
Warm Up Before Every Session
Always start with 3 to 5 minutes of light activity such as marching in place, walking, or gentle stair climbing. This increases blood flow, warms your joints, and prepares your muscles for movement.
Choose the Right Footwear and Space
For wall squats, never wear socks. Use bare feet or non-slip shoes instead. For tripod foot training, go barefoot to feel the floor better. Always ensure your exercise space is clear of clutter and has stable support nearby.
Listen to Your Body’s Signals
Knee or back pain is a clear signal to stop. Adjust your depth, reduce your reps, or drop to a simpler variation. Pain-free movement is always the goal. If you go too deep, just sit down. No harm done.
Breathe Properly and Engage Your Core
Inhale as you lower into the squat and exhale as you rise. Keep your core tight by pulling your belly button toward your spine. This stabilizes your trunk and protects your lower back throughout the movement.
Stick to a Simple Beginner Routine
Start with this beginner-friendly plan:
- Warm up by marching in place for 3 minutes
- Perform 10 mini squats while holding the countertop
- Perform 10 sit-to-stand reps using a chair
- Repeat this routine 2 to 3 times per week
Once 20 reps feel easy, progress to lighter touches on the chair, then to air squats. Add weight only when your form is flawless.
Frequently Asked Questions About Squats for Seniors
What Is the Safest Squat Variation for Seniors Over 70?
The mini squat with countertop support is the safest starting point. It builds leg strength with minimal joint stress and gives you something stable to hold for balance. Once you can perform 20 pain-free reps, progress to chair-assisted sit-to-stands.
How Often Should Seniors Do Squats Per Week?
Most seniors benefit from 2 to 3 sessions per week. Consistency matters more than intensity. Allow at least one day of rest between sessions so your muscles can recover and adapt.
Can Seniors Do Squats with Bad Knees?
Yes, but with important modifications. Avoid deep squats that cause pain, use a chair to control your depth, and never bend your knees first. Stick to pain-free ranges of motion and consider consulting a physical therapist for personalized guidance.
Should Seniors Squat All the Way Down?
Only if you can do so without pain. Your safe depth is wherever you feel strong and in control. Many seniors benefit from using a chair to limit depth and prevent overextension. A shallow, correct squat is always better than a deep, painful one.
What Muscles Do Senior Squats Target?
Squats primarily work your quadriceps, hamstrings, glutes, core, and hip muscles. These are the muscles essential for standing from a chair, walking, climbing stairs, and maintaining overall independence.
Is It Normal for Seniors to Feel Wobbly During Squats?
Some wobbling is common, especially when you’re first learning the movement. The tripod foot technique and goblet counterweight method both help improve stability. If wobbling persists, reduce your depth or use a countertop for support until your balance improves.
Key Takeaways for Squatting Safely After 60
Learning how to do a squat for seniors is about building strength, balance, and confidence for everyday life. Start with the stability-first method using a goblet counterweight, tripod foot setup, and hip-back sequence. Progress gradually through mini squats, chair-assisted sit-to-stands, and supported variations before attempting full air squats. Always prioritize form over depth, listen to your body, and stay consistent with 2 to 3 sessions per week.
Your next step: Choose the variation that matches your current fitness level and commit to performing it three times this week. Track your reps and how you feel, then adjust your depth or support as you grow stronger.